> For the complete documentation index, see [llms.txt](https://docs.soraco.co/docs/llms.txt). Markdown versions of documentation pages are available by appending `.md` to page URLs; this page is available as [Markdown](https://docs.soraco.co/docs/email-framework/configuration/sending-emails-using-the-gmail-api/how-to-create-a-gmail-service-account.md).
# How to create a Gmail Service account
Applies to: QLM Pro v17
***
A Gmail Service account is required when sending emails from the QLM License Server, the QLM Portal, or the QLM Self Help.
To create a Gmail service account you must have a Google Workspace (G Suite) account.
Go to the [Google Cloud Platform Console](https://console.developers.google.com/) and sign in as an administrator.
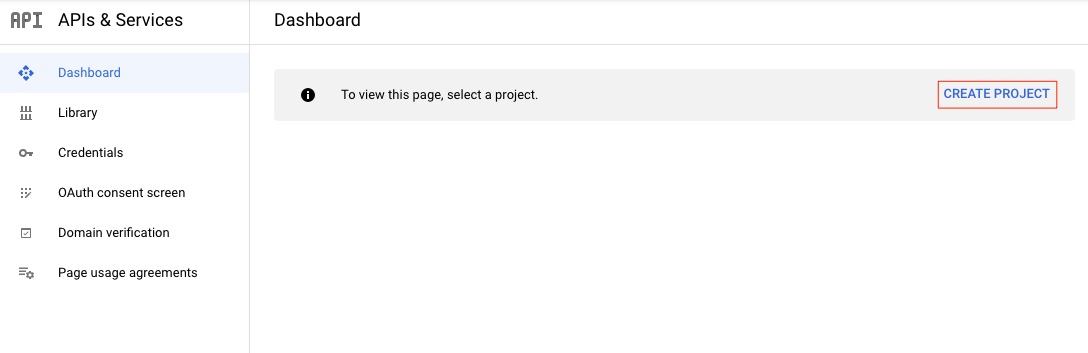
* From the main dashboard, click **Create Project**.
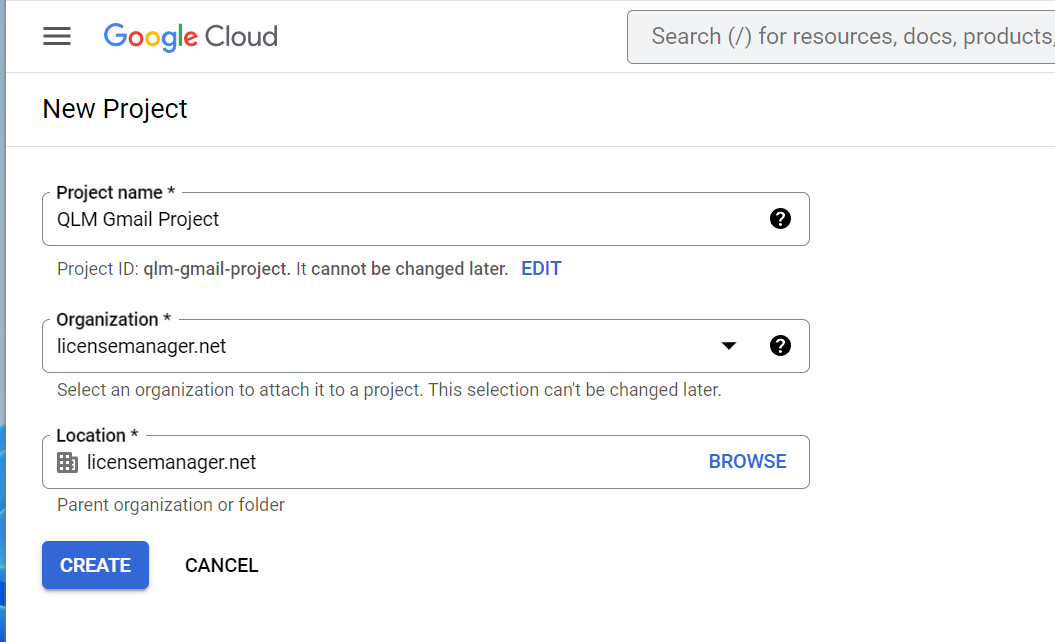
* Enter a project name and select your organization
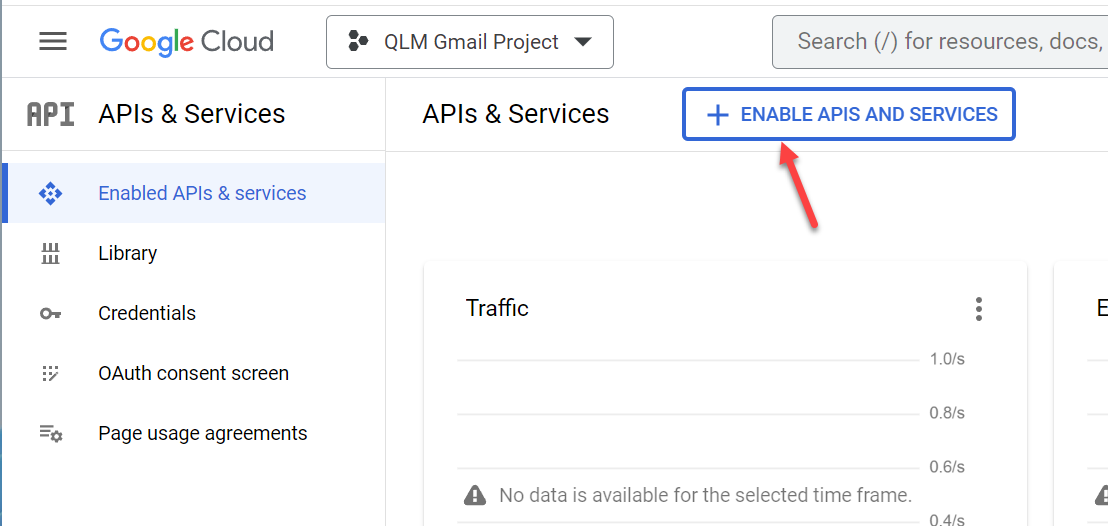
 * Select your new project and click **+ Enable APIS and Services**
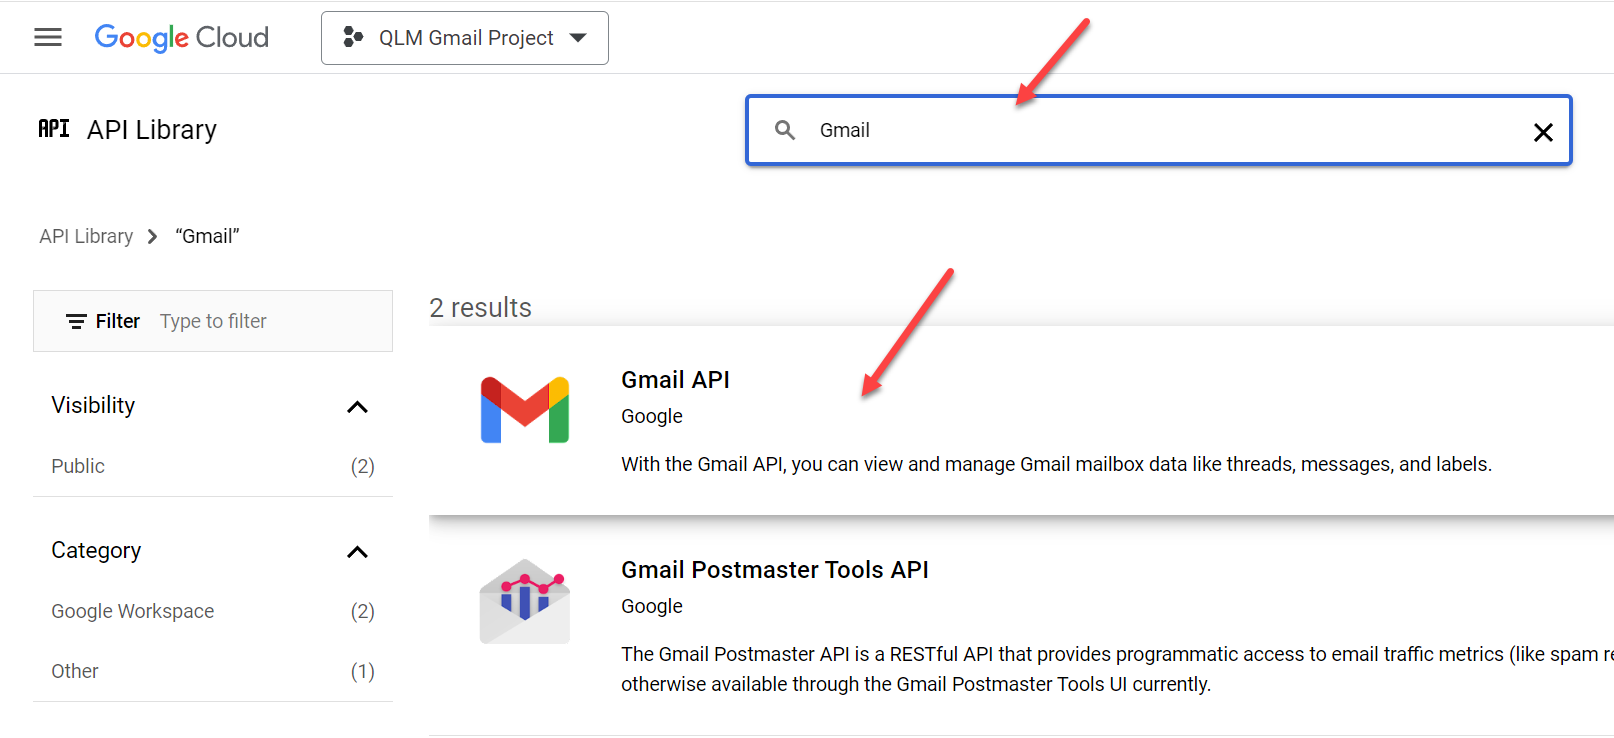
* Enter Gmail in the search field, select the Gmail API option then click **Enable**.
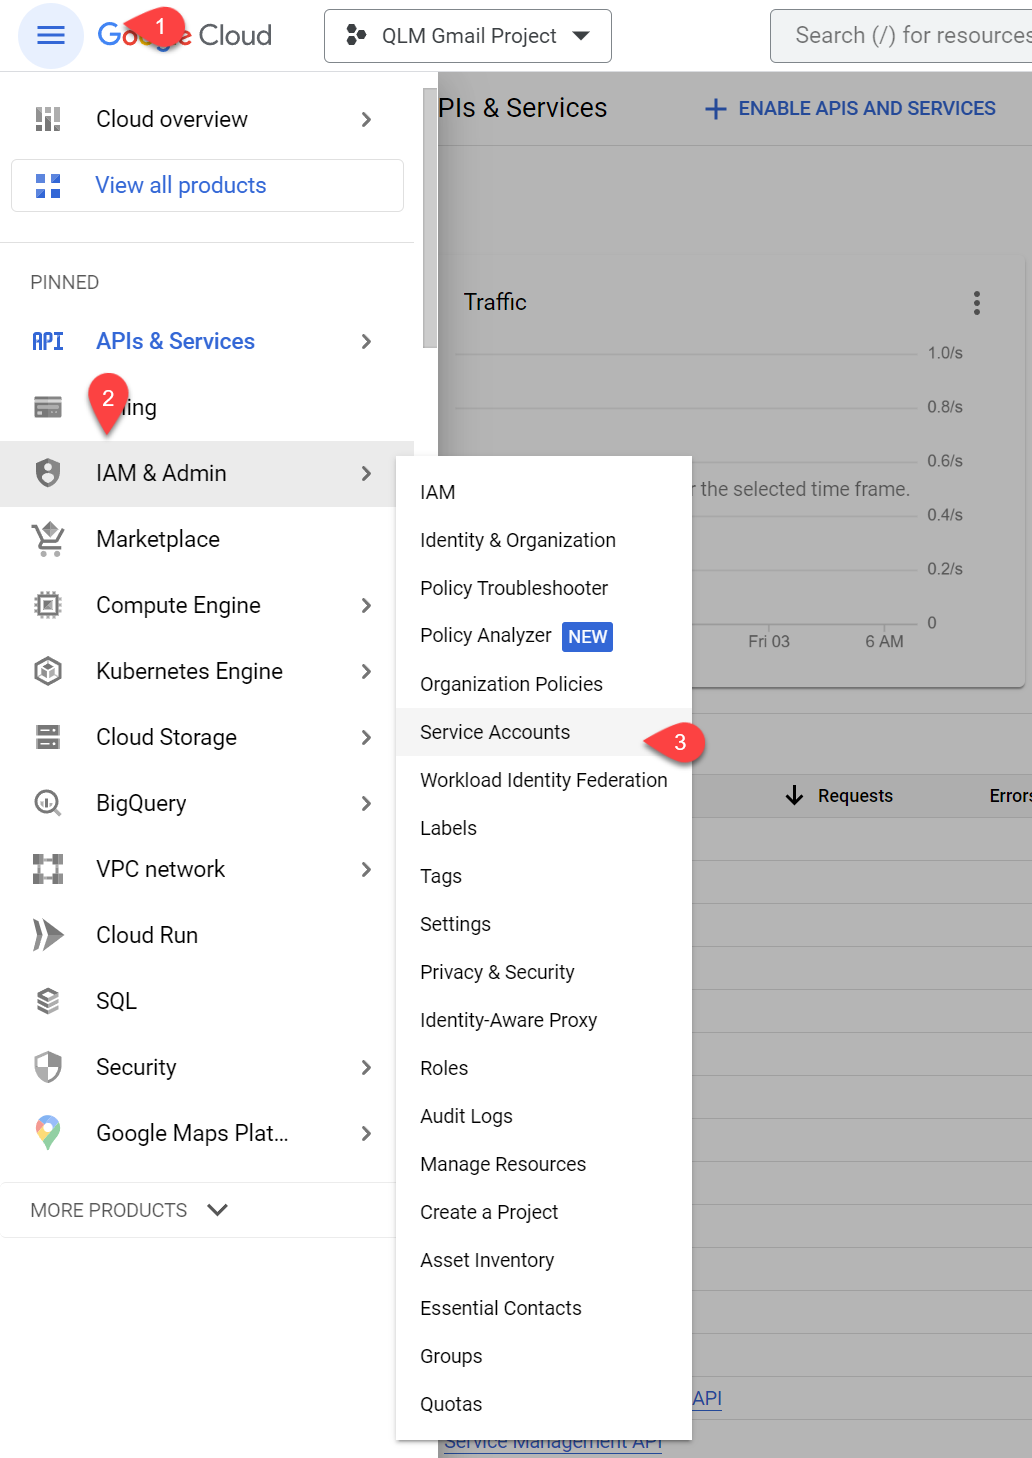
* To create the service account, select Service Accounts as shown below:
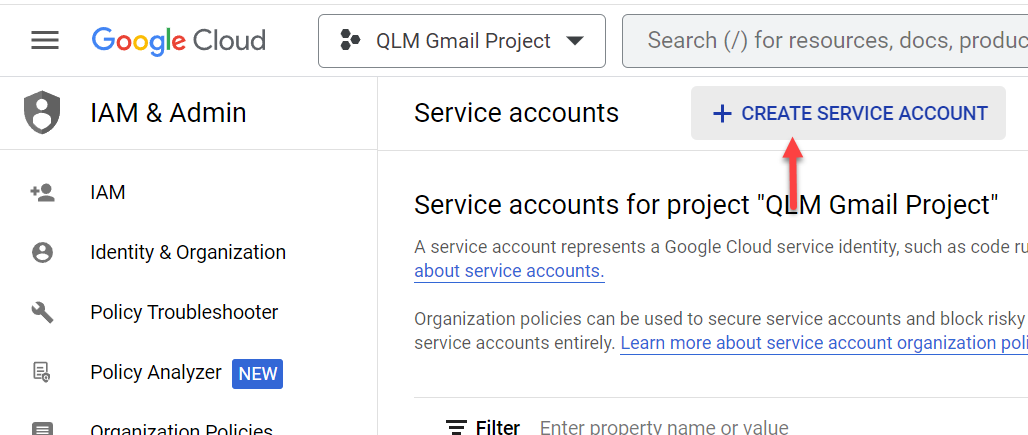
* Click Create Service Account
* Enter a name for your account then click Create and Continue
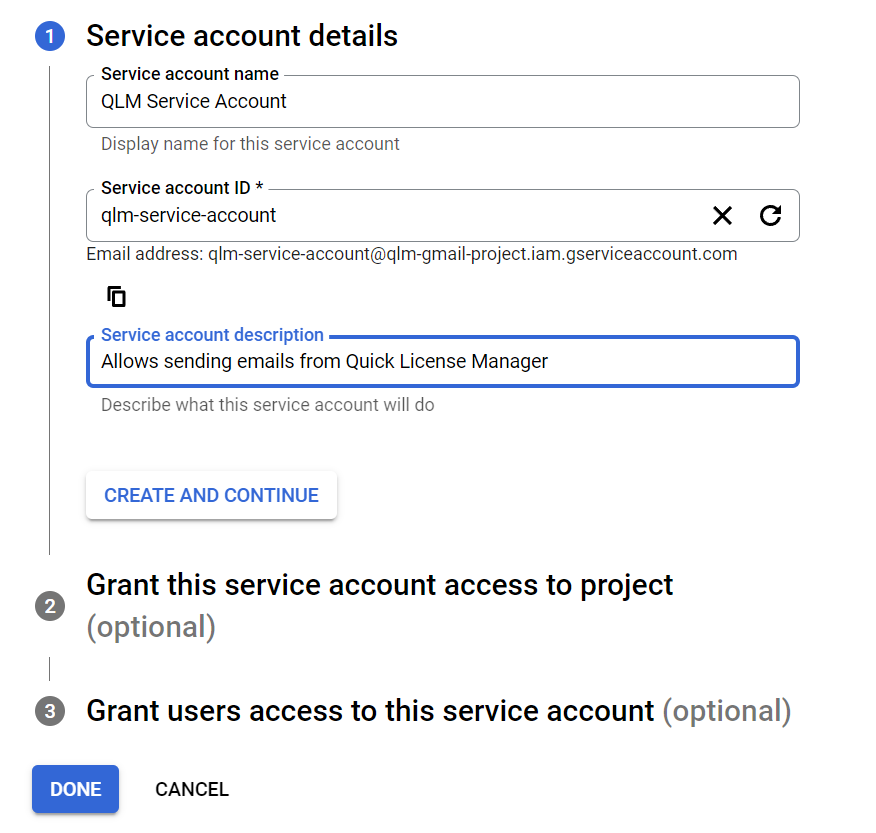
* Leave all the default options for the Service Account Details and click Done.
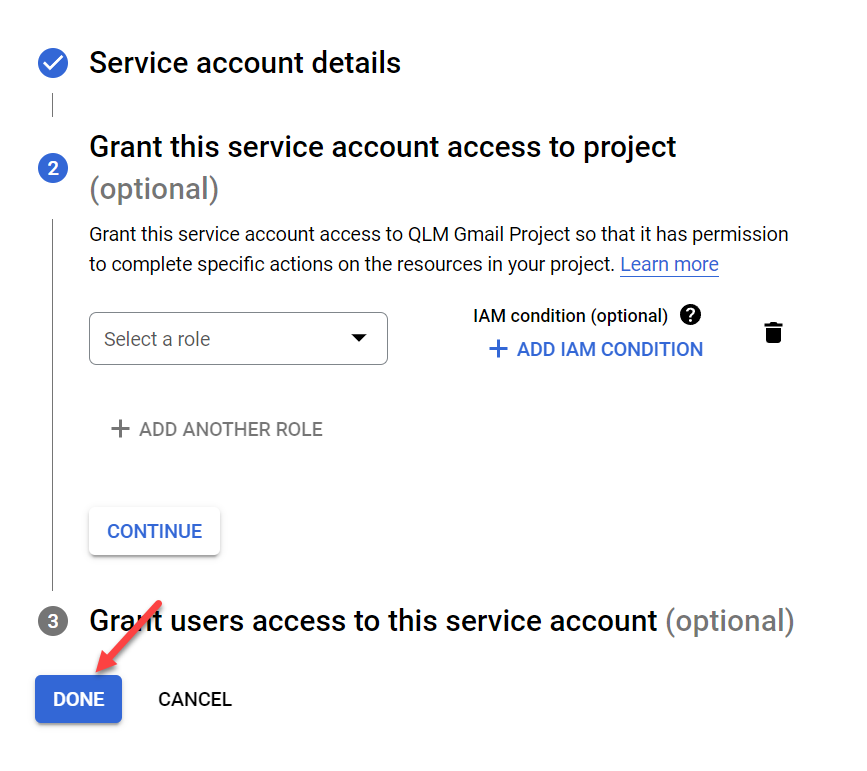
* Copy the Client ID
* Select Manage Keys as shown below:
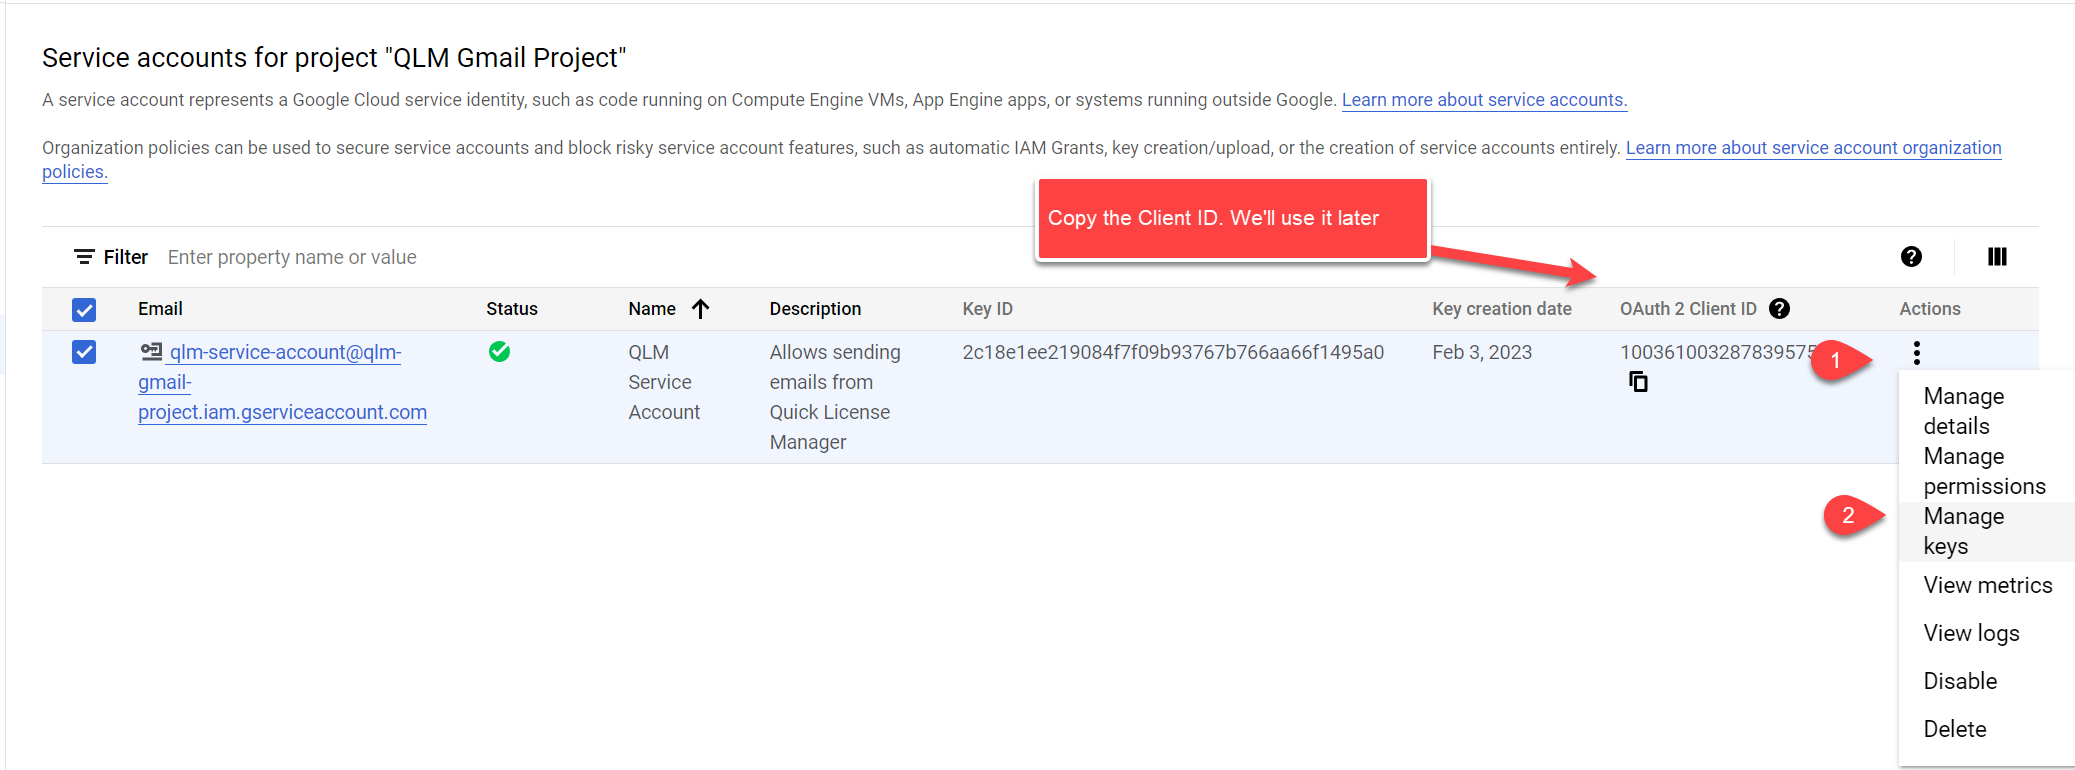
* Click Add Key / Create new key
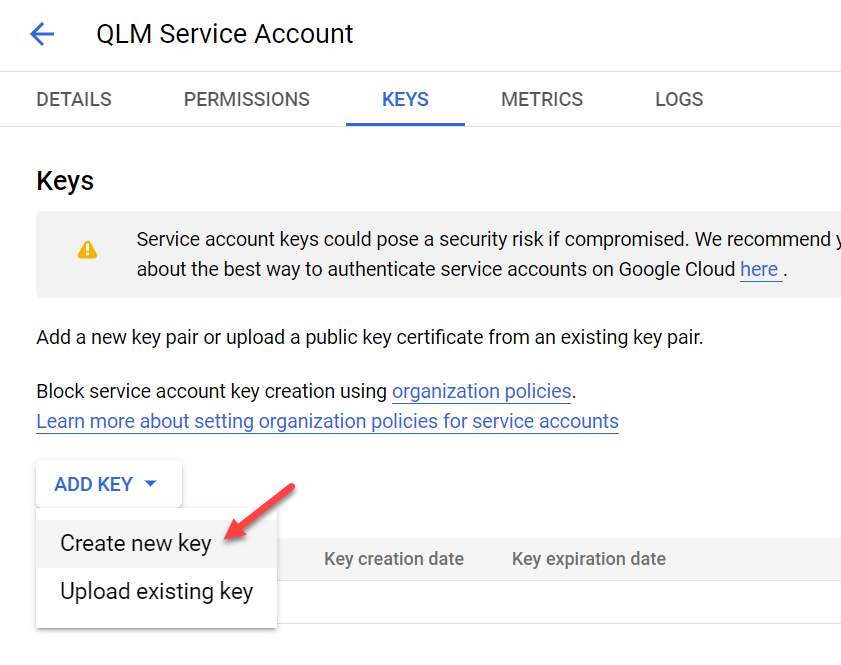
* Select JSON for the key format and click Create
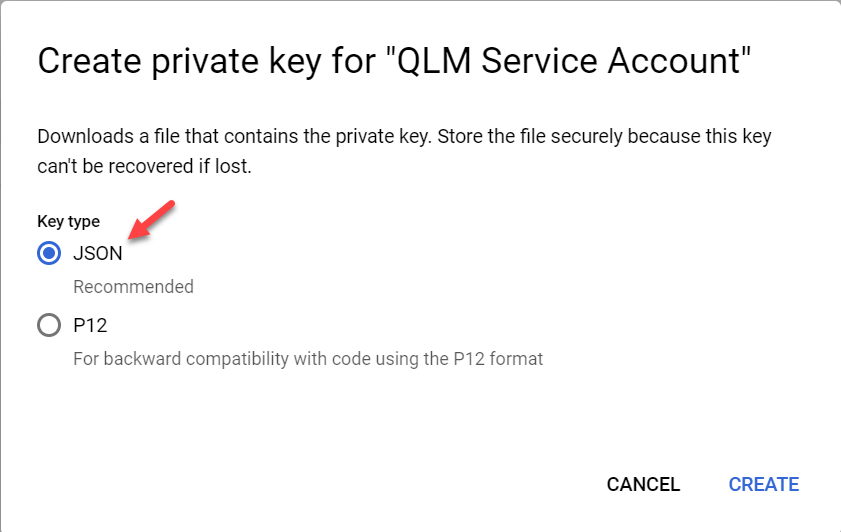
* Store the generated JSON file securely. You will need it later on when configuring QLM.
*
* Next, you must enable service accounts with Gmail.
* Login to the [GSuite Admin Console](https://admin.google.com/).
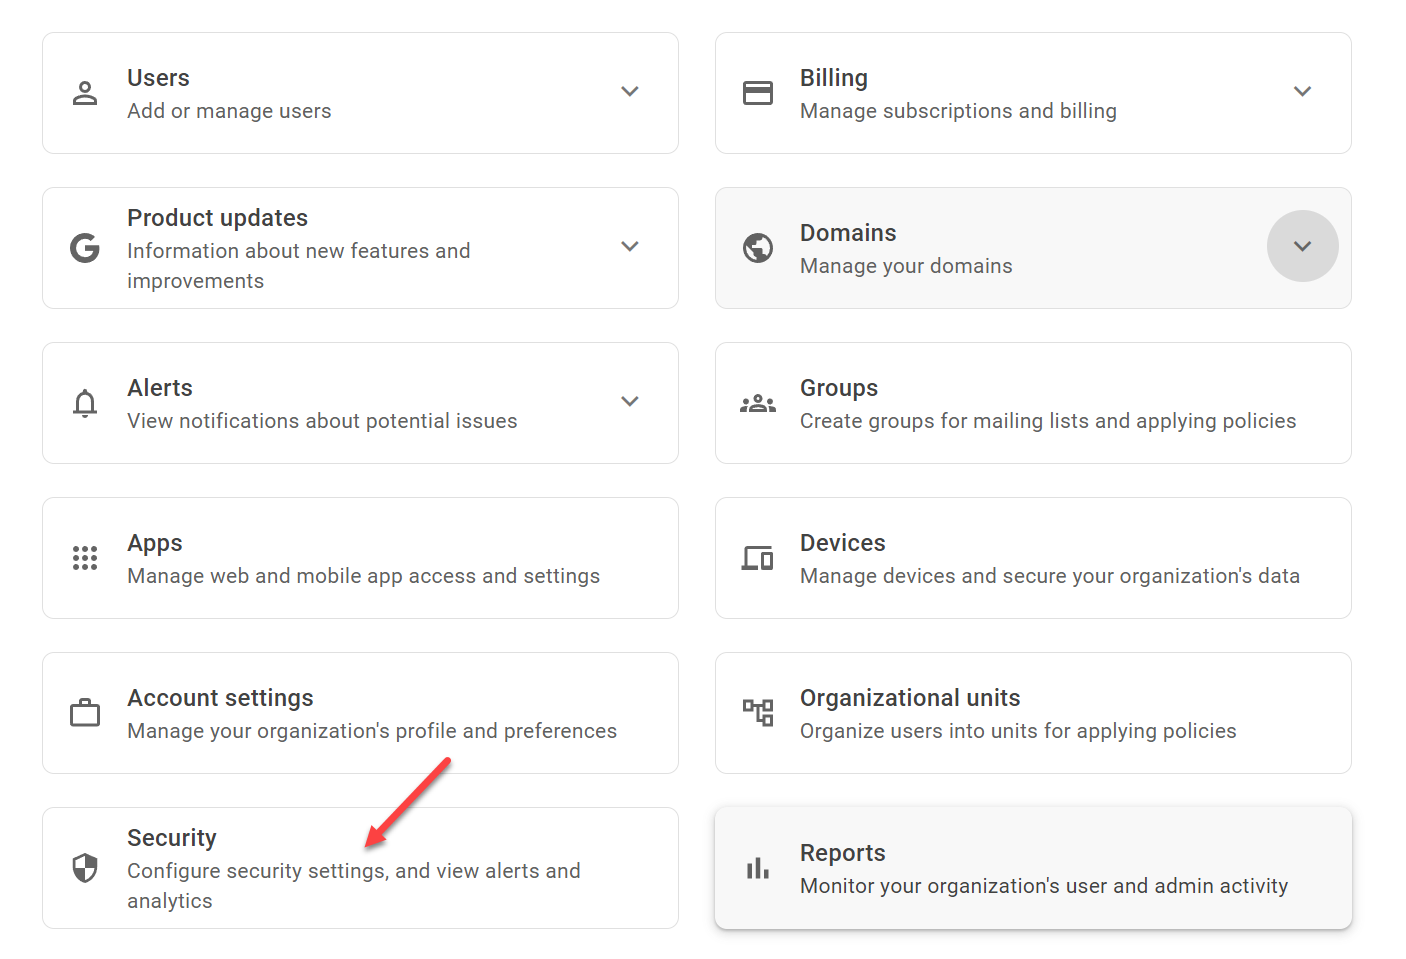
* Scroll down to locate the **Security** item and select it
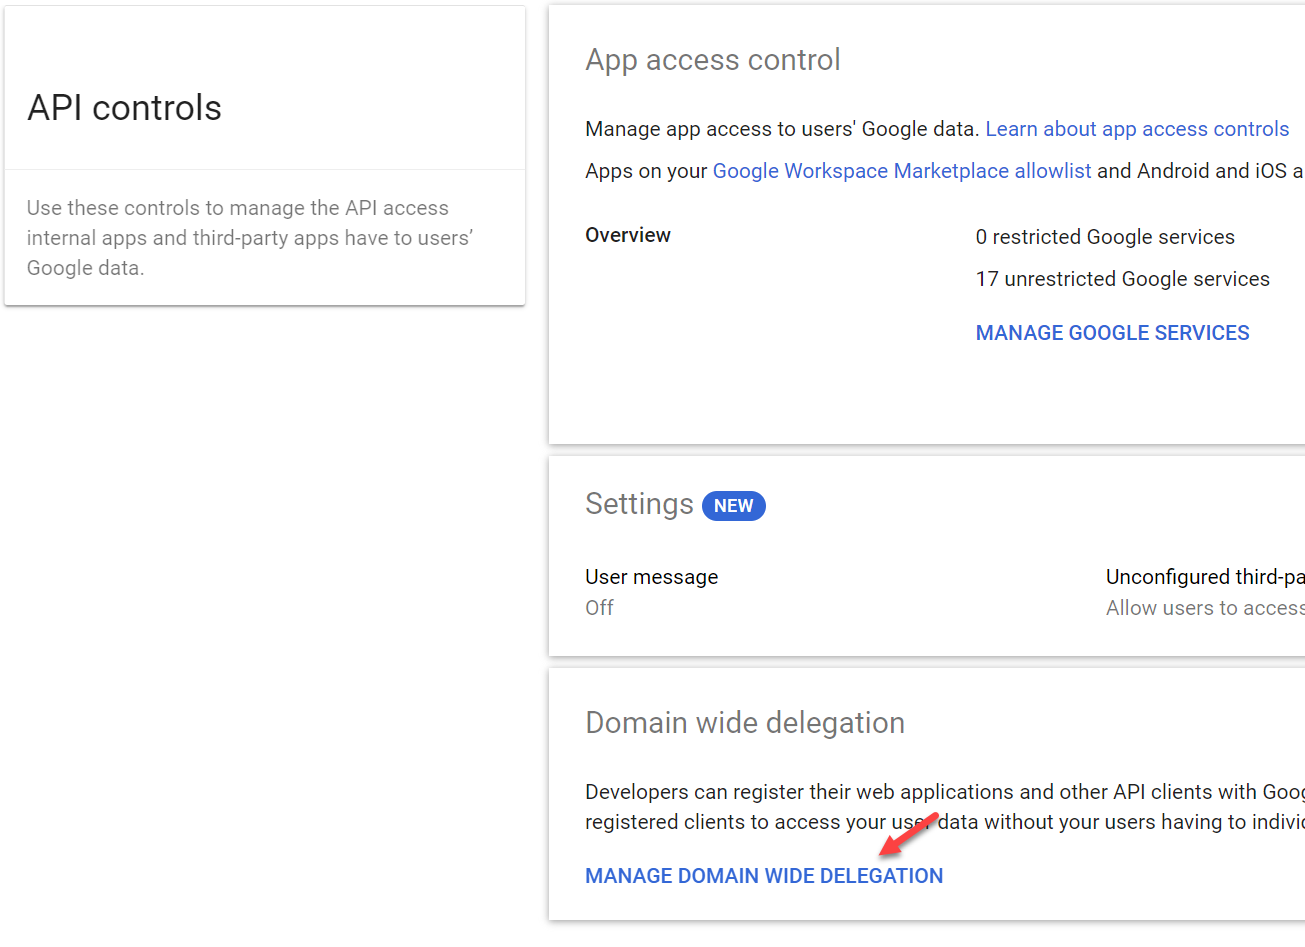
* Scroll down to locate the **API Controls** item and select it
* Click Manage Domain Wide Delegation
* Click Add New
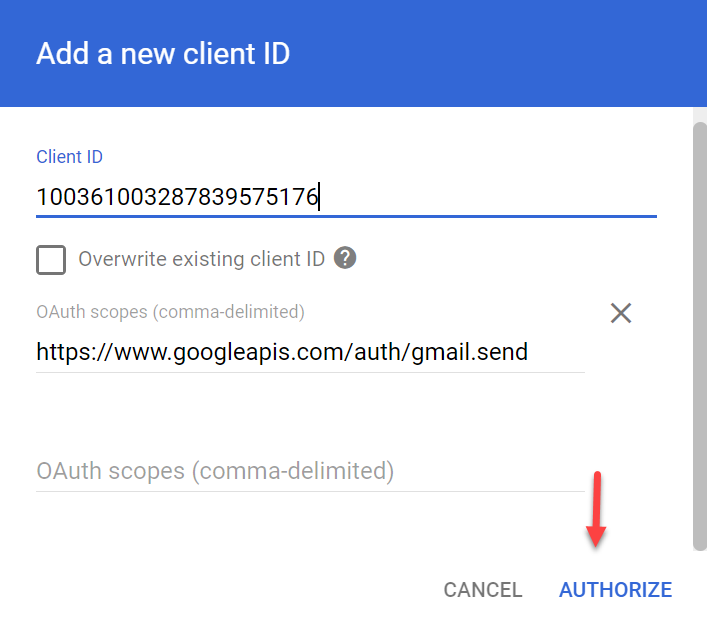
* Enter the Client ID that you copied earlier
* Set the authorization scope to:
* Click Authorize
* Select your new project and click **+ Enable APIS and Services**

* Enter Gmail in the search field, select the Gmail API option then click **Enable**.

* To create the service account, select Service Accounts as shown below:

* Click Create Service Account

* Enter a name for your account then click Create and Continue

* Leave all the default options for the Service Account Details and click Done.

* Copy the Client ID
* Select Manage Keys as shown below:

* Click Add Key / Create new key

* Select JSON for the key format and click Create

* Store the generated JSON file securely. You will need it later on when configuring QLM.
*
* Next, you must enable service accounts with Gmail.
* Login to the [GSuite Admin Console](https://admin.google.com/).
* Scroll down to locate the **Security** item and select it

* Scroll down to locate the **API Controls** item and select it
* Click Manage Domain Wide Delegation

* Click Add New
* Enter the Client ID that you copied earlier
* Set the authorization scope to:
* Click Authorize